Taking advantage of the discounts in November, we decided to execute a project of ours we’ve been thinking about for a while: To get a 3D printer. We asked & looked around, calculated our budget, and got a Bambu Lab A1 Mini. It was small, but we were just beginning. You may say “Great, but what does that have anything to do with LEGO?” Patience, grasshoppers, I’ll get there :)
It’s been more than 15 years since I’ve used CAD software, and my partner knows nothing about it. However, we’re both good with computers so we thought we’d be okay. At first, we printed a few models we found on the web. We realized very quickly that they weren’t going to be enough. If we wanted to turn this into a business, we had to learn to design our own stuff. We downloaded and tried a few different software, eliminated all of them. Then we came across this software called Fusion 360. The page that recommended it had a few tutorials for beginners. We started to watch.
I studied architecture, so I know AutoCAD and 3dsMax. I got the feeling that Fusion is the combination of these two. Some commands are exactly the same, even their shortcuts. Some have the same names, some have changed, but close to the ones before. I thought “Hey, this looks easy!”.
Sure, it was easy – not! I mean, I’ve never used the software before. Even though some things are familiar, there are tons I don’t understand. Either by watching videos, or asking Google what I want to do, I started making my own models.
Aaaand enter LEGO!
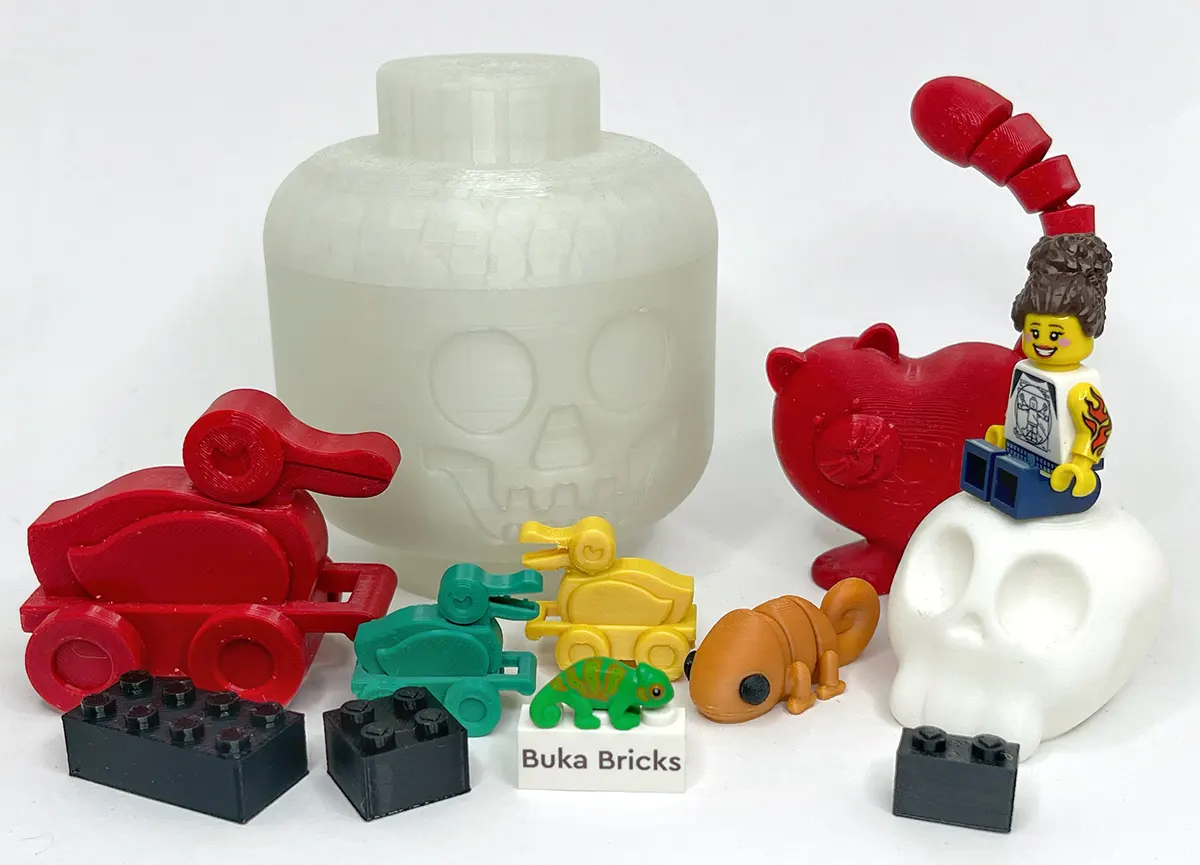
LEGO bricks were among my first models. It’s very easy to find their dimensions, there are even tutorials that show you how to model a LEGO brick. I modeled and printed four different ones: 1×1, 1×2, 2×2 and 2×4. Everything seemed fine, but they weren’t compatible with the original parts. Well, at least they clutched on to each other, that’s something, right? I tried again, with more detail this time. Nope, not working. I said “Oh, well. I’m not going to mass produce this anyway. Let this be just a trial model.”
The second model was a bit more complicated. You may have come across these tiny storage boxes in LEGO Stores. I may have gotten a few when I first saw them. They’re on my desk, right in front of me. It’d be functional, and I didn’t need to get the exact dimensions, either. I measured the box and modeled my own. My first try wasn’t too good. The studs were too small, and the lid was dangling all over the box. After a few tries, I had the box in my hands. I had a tiny box not very far from its original.

For my third, I picked the LEGO skeleton head box. I had found one on the web and printed it, but it wasn’t what I wanted. I have a soft spot for the skeleton, so I fell in love with it when I first saw it. However, I stopped myself from buying it every time. I’d rather buy a set with that money… Anyway, I modeled the head using several tutorials. That was the easy part. Now I had to turn it into a box. Since its design was different than the brick box, I needed to do some calculations. It took a while, but I solved the problem. I searched the web to learn how to make a face on a curved surface. I managed to get it right on my second try. I printed two sizes, a small one to accompany the other small boxes, and a big one to put stuff in it.

Did someone say duck?
Since I also had other things to do, the time it took me to start modeling wasn’t as fast as I wrote here. Before we started making our own models, we printed the models we found on the web. One of my first prints was the minifigure scale LEGO wooden duck – it’s been on my mind for almost two years. The LEGO Group 3D printed it as well and let_them_fly made a model of it and put it on the web. I downloaded it as soon as I saw it; I even asked a friend who had a 3D printer back then, if he could print it for me. He told me since the model was small, it didn’t come out good. I kept the file thinking “One day…”.
Obviously, it was the first thing I printed when I got my own printer. However, I may have gone a little crazy after waiting for two years. So much so that our printer is now called “The Duck Maker”. I have never had an army of any minifigure or animal in my life, but now I have an army of ducks :)

“All animals are equal, but some animals are more equal.” – George Orwell
Of course, not every print comes out as good as you want. There may be problems, sometimes at the start of the print, sometimes towards the end. Until we figured out what’s what, we had a lot of misprints. There are some I can easily call faulty, and yet they still have a place in my army. Even though we now know how to adjust the settings, it’s not always enough. You can send a model with perfectly good settings to the printer and still have problems. You can see some of my faulty ducks below. Problems while printing, problems while removing the supports, misprints, double-colored due to filament being finished mid-print (actually, the last one is looks pretty cool :)). All of them are displayed together. I’m not training Spartans here, am I?
Should we move on to bigger models, now?
I get the same question after every duck I print: “How many more will you print?” I give the same answer every time: “Until I get one from every color”. To be honest, I have no nostalgic memories of the wooden duck. I have never thought about getting the LEGO House set. But I just love the minifigure-scaled version. That’s where logic comes in and prevents me from spending a meaningless amount of money for a small part, no matter how much I love it. Besides, why shouldn’t I make my own duck when I have the means? True, its wheels don’t move like the original, its beak doesn’t close (and not for lack of trying). But this version is enough for me. Besides, when I up the scale, I can get that to work, too!

Anyway, let’s leave the ducks for now. There were models I’ve found on the web, that I wanted to try printing, but I kept myself from doing so. Finally, I said “Enough! I’m doing it!”. I decided to print a skeleton figure, parts modeled to be printed separately and assembled later.
The print was okay, but the hands and feet didn’t stay in place, so I had to glue them. Shame, I thought they’d move, too. Anyway, at least the head, the arms and the legs move. Is the head too small? Looks like. I can model this better!
Yep, once you do your own models, you don’t like the models of others :))
Dragons!
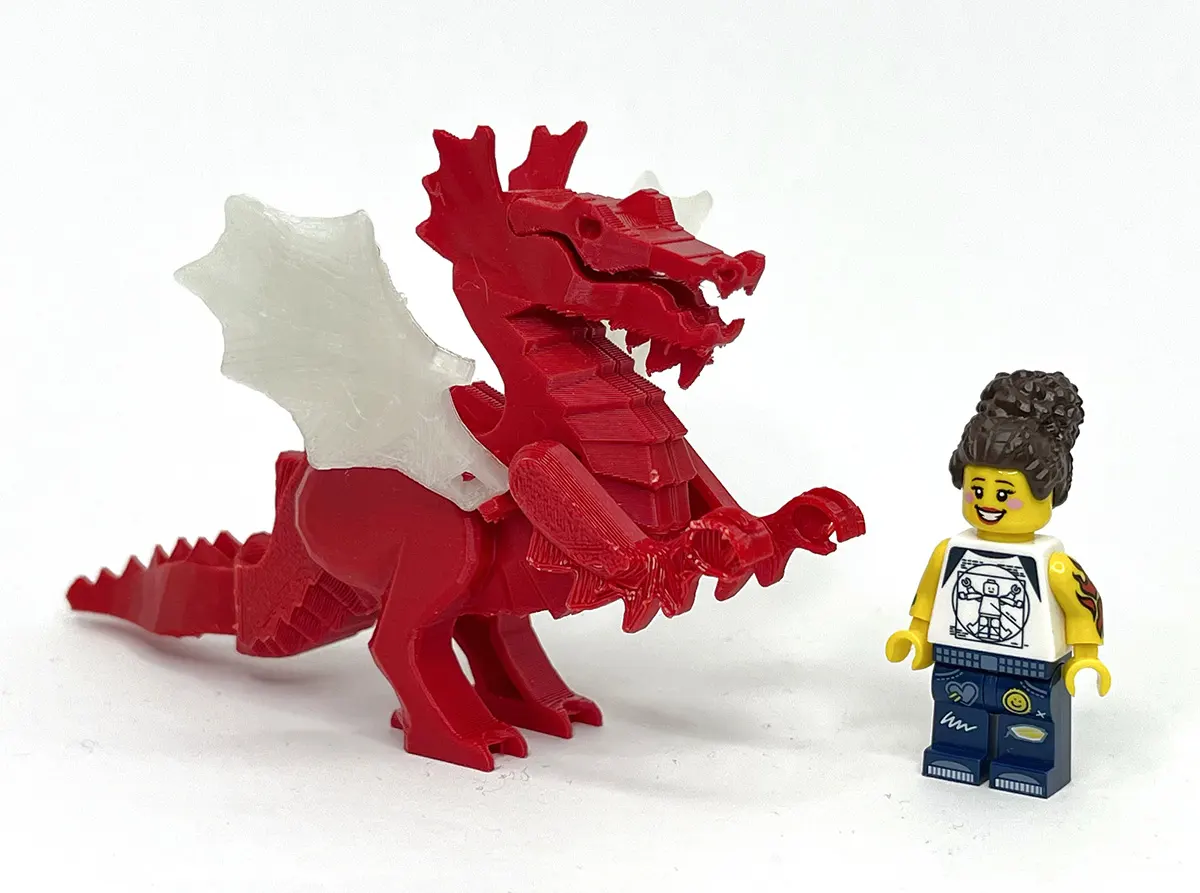
You know the classic dragon, right? It’s at the top of my wish list, but I couldn’t find a suitable seller so it’s not in my collection yet. Someone modeled that. I thought “I’ll make do with the fake one until I get the real thing.” and printed it. The body is made of three parts, joined after printing. The wings, the arms, the tail, the upper head… everything looks great. Of course there’s a but coming. It’s not compatible with LEGO bricks! I mean, if my sigfig can’t sit on the dragon, what good it is to me? Nope, not good.
Then I thought of something. Modeling bricks is one thing, but there are too many details on the dragon to model easily. Measuring those would be a nightmare, too. I thought “They probably got it from somewhere and played with the details a bit.” Where could they have gotten it from? LEGO software, of course. I can do that, too!
I did. I found the dragon’s parts in Studio, exported from one software to another (yeah, you need to do that), and made it printable. Perfect. I opened the printing software. It said, “There’s an error on such and such place, should I repair it?”. Fine, repair it. Done. Then let’s print!
First, you shouldn’t always click “Yes” when it asks you to repair the model. Second, you should always check the model before sending it to print. My second dragon, while compatible with LEGO bricks, has no arms. The software “repaired” the holes the arms were supposed to go into. Thank you, software, my model would’ve been faulty if it wasn’t for you :P
Classic Space, of course!
There are tons of 3D-modeled minifigure stands. They’re obviously in high demand. It’s possible to find official LEGO stands even in Turkey, now. They’re great if you have 15-20 minifigures, but if your collection has 1000+ of them, they’re a bit too much for your wallet. I solved this by displaying my minifigs on 32×32 baseplates. Thanks to the girls, I can’t do that anymore. Still, it would’ve been nice to display some of them, at least the Classic Space figures who have become very popular lately.
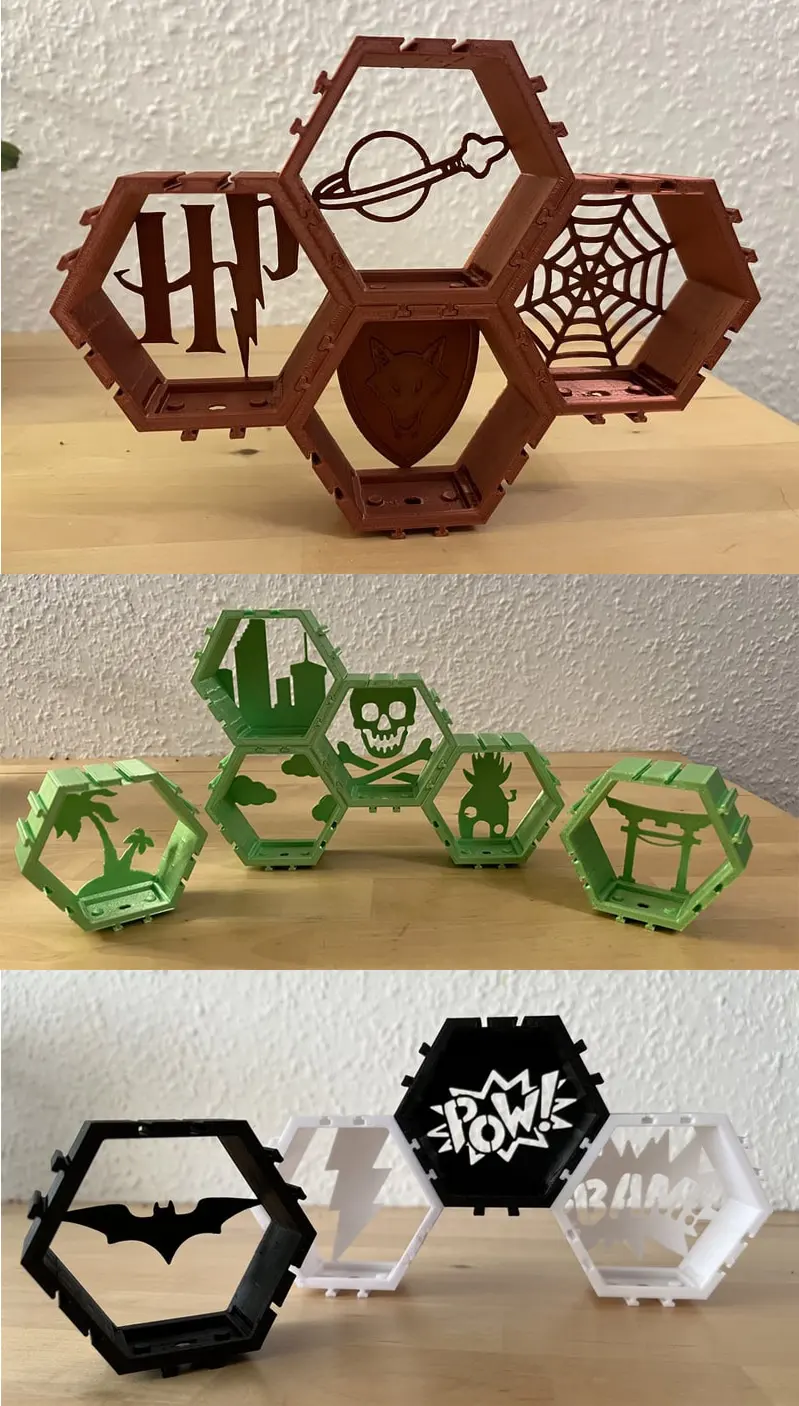
I came across an incredible collection while surfing. Hexagonal stands that fit together and look great when next to one another. The person who modeled it also put logos on the back of the stand for various LEGO themes. You want to display Marvel figures? You print the one with the Marvel logo. Space? Yes. Batman? Of course. I made a few stands for my Classic Space minifigures. You put the baseplate from the CMF series in it and place the minifigure. Classic Space logo on the back, astronauts in the front. It’s not super strong, can’t be easily moved around when they’re put together, but they look beautiful.


The point?
There isn’t one. Seriously. I really like this 3D printing thing, so I wanted to share it with you. The things we talk about (about the duck army, for example), the difficulties we come across when modeling, problems we have with prints and the joy we have when they turn out the way we want. Like with any new hobby, it has its ups and downs.
I printed a few things other than LEGO pieces and accessories, too, as you can see below. They’re mostly small toys. In our team, my job is to provide technical support when needed. Even though we started using the software at the same time, my history with CAD makes it easier for me to understand some things easily. Having a better level of English helps, too. Besides that, I’m more into making my own toys.
So where’s my dad when all this is happening? Looking at every single thing we print with tears in his eyes. Everything we see “faulty” goes to his little treasure chest. Sometimes he gives us an idea, we print it, and he becomes the happiest man in the world. He’s 82, and it gives him so much joy to be seeing this technology.

I’ve said it before, no harm in saying it again. I’m very lucky. To have such means, such “toys”, along with all the beautiful people in my life.
That’s it from me. Take care of yourself!
The images showing stands with different themes are from the designer’s page. The rest are mine.
Some girls play with Barbie dolls, while others create small worlds with LEGO minifigures and continue to do so when they grow up. You can probably guess which group I belong to :)


